Would you love to learn more about how to paint a watercolor apple? Are you a beginner at watercolor painting or watercolor pencils?
Well, I love to do a life painting with apples. I’ve done several of them.
For this blog post, I thought I’d share a new idea: showing you how I do a watercolor painting of a red apple with watercolor pencils.
I really love the shape of apples. I do think I love the color. Red or green apples, it doesn’t matter. And, for sure, the texture speaks to me as a creative.
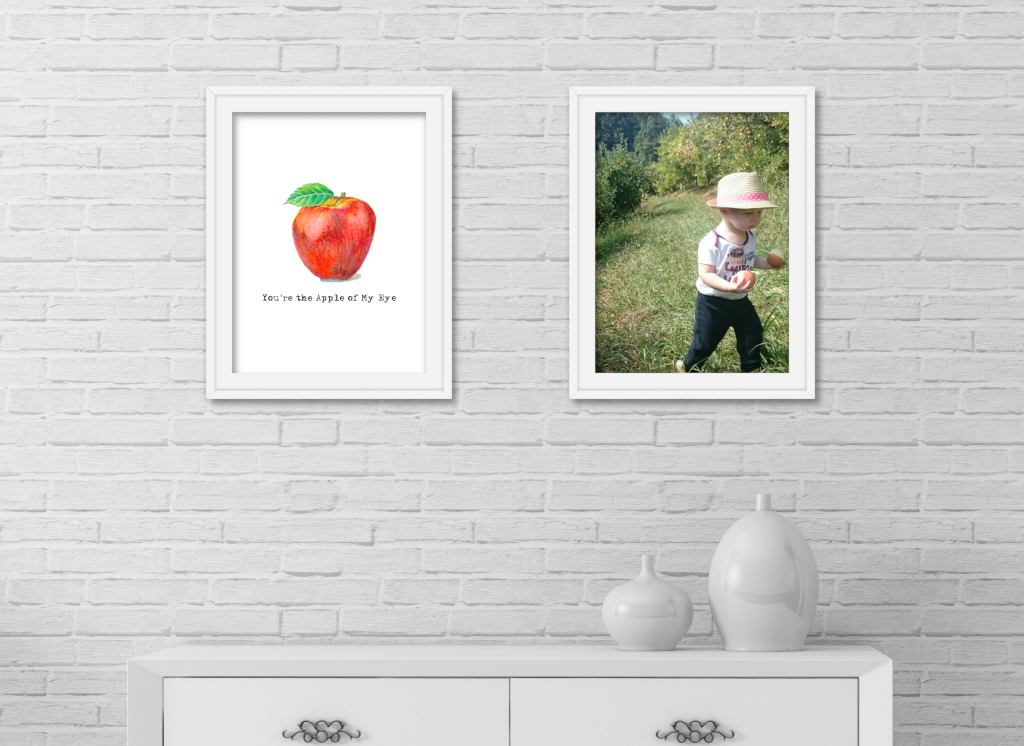
In this case, I’ll show you a few basic techniques about how I drew and painted this particular apple for my printable “You’re the Apple of My Eye” which you can see up close in my Etsy shop.
Reference Photo or Tracing?
I think you should do what helps you get started the easiest. You can freehand an apple or trace one from a reference photo.
Personally, I find using watercolor pencils a great aid because most people feel comfortable using pencils before they get comfortable using a paint brush.
Painting an apple with watercolor pencils will give the apple a ton of texture and give it a believable feel.
First Step of This Watercolor Painting
Step 1 – First Thing: Make a Light Sketch of the Apple
The easy way to do this, is to trace a picture of an apple.
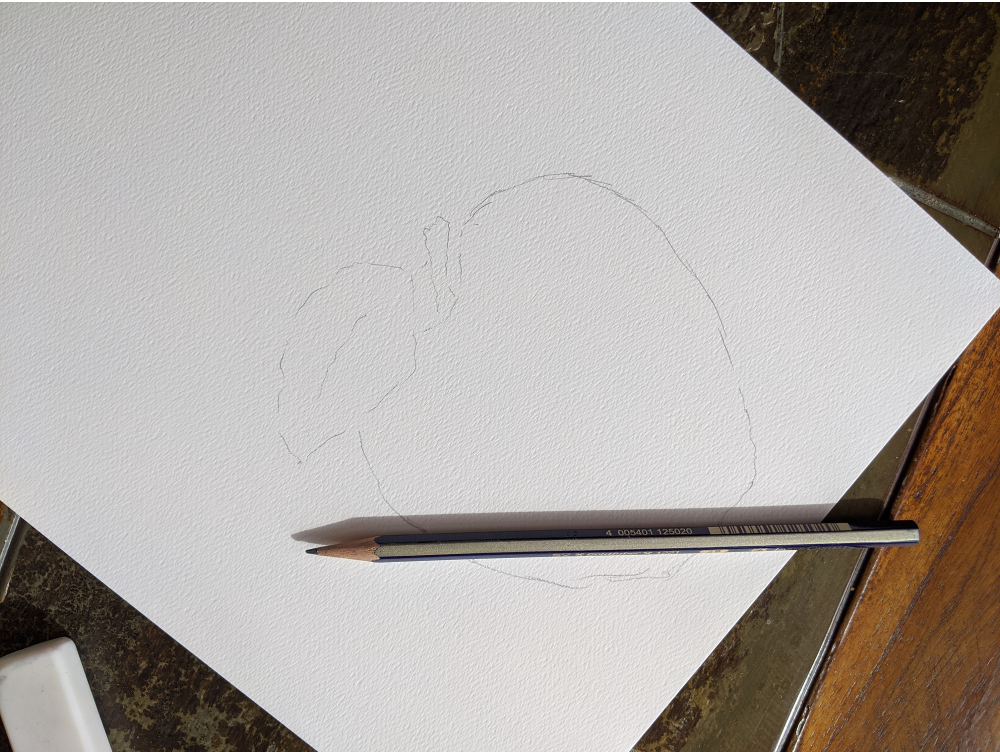
The apple shape sketch is very light, as you can see. I even darkened the photo so you could see it. After I finish the sketch and I’m satisfied with my apple drawing, I go over it lightly with an art eraser.
You’ll need to use watercolor paper, not just regular paper, even if it’s sketch paper. With the watercolor pencils, I’m still adding water.
I’m using cold press, 140lb watercolor paper for this project.
I can barely see my initial sketch when I’m ready for my base layer. Here’s the key: I won’t be able to erase my outlines after I paint this apple. So I want my sketch just dark enough I can see my outlines and any extra markings I deem are important for color, shading or detail placement.
As I’m drawing the shape of the apple, I take a step back every few minutes. It helps so much with your art if you keep both the big picture and the up close in focus simultaneously. Your sketches will often improve as you draw with this principle in mind.
Remember, the amount of detail in this apple will come later. I keep my sketch loose and open; focusing on proportions and placement.
If you want to use any masking fluid to preserve the white of the paper, now’s the time to apply it. I didn’t use any on this particular painting.
And just like that, we’re ready to color our beautiful apple!
Step 2 – Fill in Base Color of Apple
This step is easier than you might think. Using a few practiced watercolor pencil techniques keeps the process straightforward.
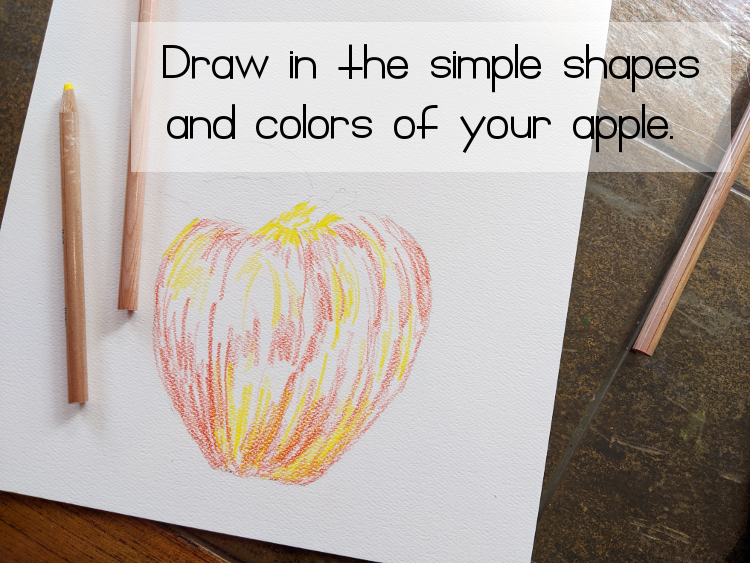
Instead of a background wash at this stage, I’m still drawing shapes. The contours of the apple. Following its hollows and where the stem on the top disappears into its core.
I also see the colors in shapes. The colors have movement; they flow this way and create a curve. They flow that way and grow deep with shadow.
I do believe you can teach yourself to see these things. My own abilities have definitely sharpened with practice.
Thinking ahead, paint mixtures happen differently with watercolor pencils than with mixing paint color for a wet wash, for example.
If I was painting this watercolor apple with paint mixtures, I’d probably decide those colors ahead of time. Am I using complementary colors, for example and what will my lighter colors be?
I do something similar with watercolour pencils. I pull out the colored pencils I want, keeping in mind I will be blending them right on the watercolor paper.
(You’ll notice I don’t mention any specific colors in this very basic step tutorial of how to paint a watercolor apple with watercolor pencils. No Alizarin Crimson, Burnt Umber, Sap Green or Prussian Blue.
Why not?
Honestly because I want you to think about colors for yourself. Don’t be afraid to experiment. A little color theory does help and the more you learn for yourself the more confident you’ll be.
You can do this! Now, let’s keep painting.)
I still have to think in terms of watercolor layers. I’ll use mainly primary colors in this base layer. I laid out the yellow first layer, then went ahead and drew in the red. I even added some orange at this point.
See how I build up layers of different colors with the watercolor pencils? There is no “coloring in” of the apple at this point and I’m definitely starting out with the lighter tones first.
As always in watercolor, I can add more color and depth, but it’s hard to remove much paint after the fact, whether you lay it down with a brush or with a pencil.
This first step is an important step as far as light and shadows go. I refer to my reference photos or object and follow what I see. Light is super important so if you’re trying this along with me pay close attention to how the light plays on your apple.
Light is why we see curves, movement and shadows on an object. Without the light our objects would appear flat. Study the light!
Next – Step 3: Add Water and Grab Your Paper Towel
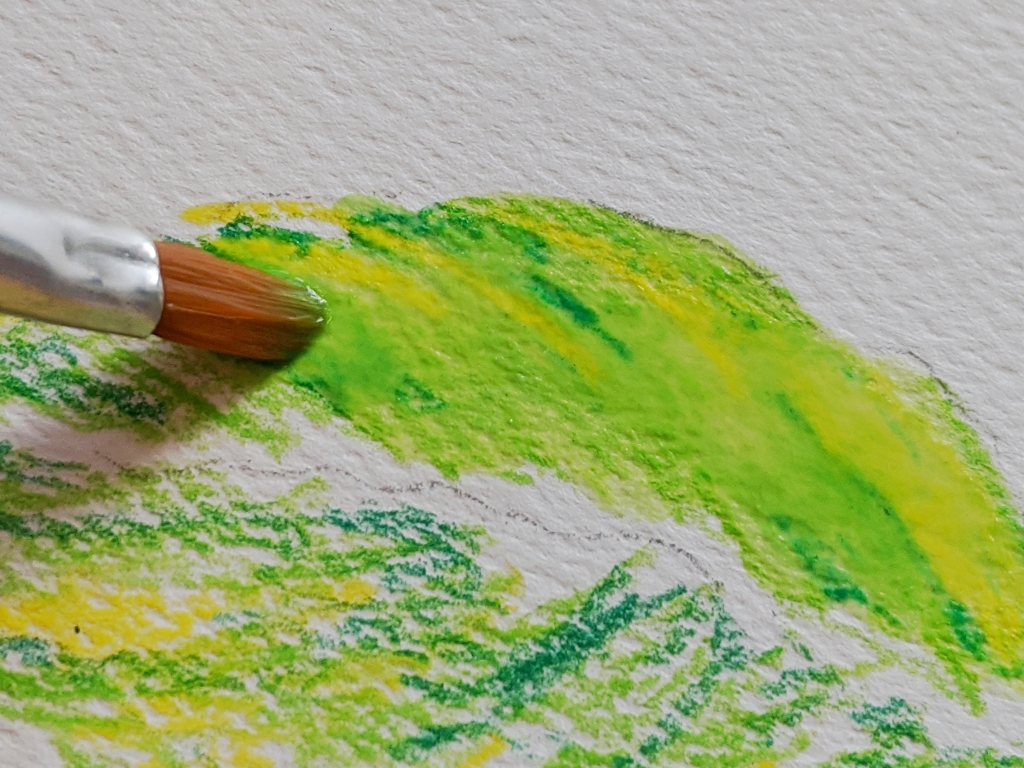
Isn’t the apple beautiful?
You can see from the close-up above how adding water changes everything in my watercolor apple.
Now there is life. The colors become vibrant and they flow. The trick with using watercolor pencils is to not wash water over the entire surface of your sketch. If you do, you’ll end up with a very muddy apple!
And do remember to use keep using clean water, which means I actually change out my water more often for watercolor pencil painting than for regular watercolor painting.
This wet technique calls for carefully thinking about where to apply the water with my paint brush (and I’m using a round brush for this painting, not a flat brush), usually wetting the lighter colors first and working my way into the dark colors.
And I like to use the tip of the brush to get fine control over where the water goes.
Once I start adding water, I don’t like it to dry on the edges until I’m done with that layer.
Watercolors – and watercolor pencils by extension – offer tremendous variety for an artist. You really do have to play around with them and decide what techniques you like best.
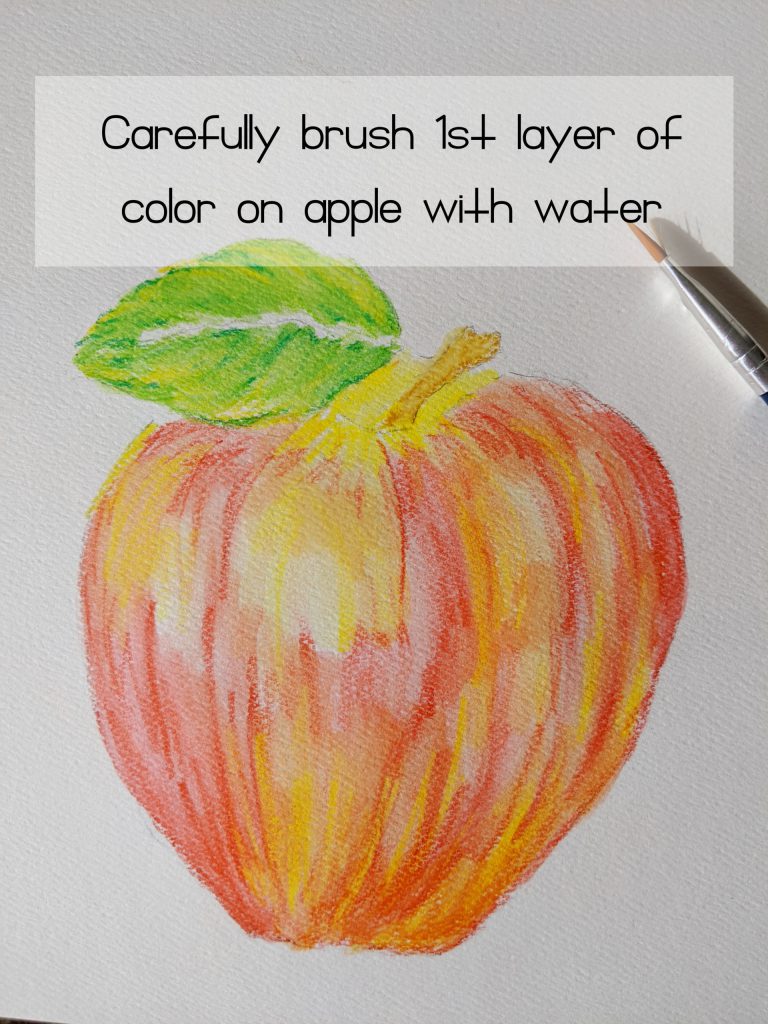
Compare this apple, which has had its first layer of watercolor pencil applied, with the photo above before I added water. Notice how much softer this photo is.
With a little clean water on my paint brush, I could have worked out the watercolor pencil lines even more at this stage but I chose to stop at this level of smooth (or not smooth, depending on your perspective!).
You can see the beginnings of the light spots and the deeper shadows, but we’re not all the way there yet!
With watercolor pencils I can literally pull and push the color to where I want it using the brush after a light wetting.
It’s one of the reasons these pencils are one of my favorite art mediums.
After this step of painting the watercolor apple, I let it completely dry before continuing.
Step 4 – Work in the Fine Details
Now is the part I really love.
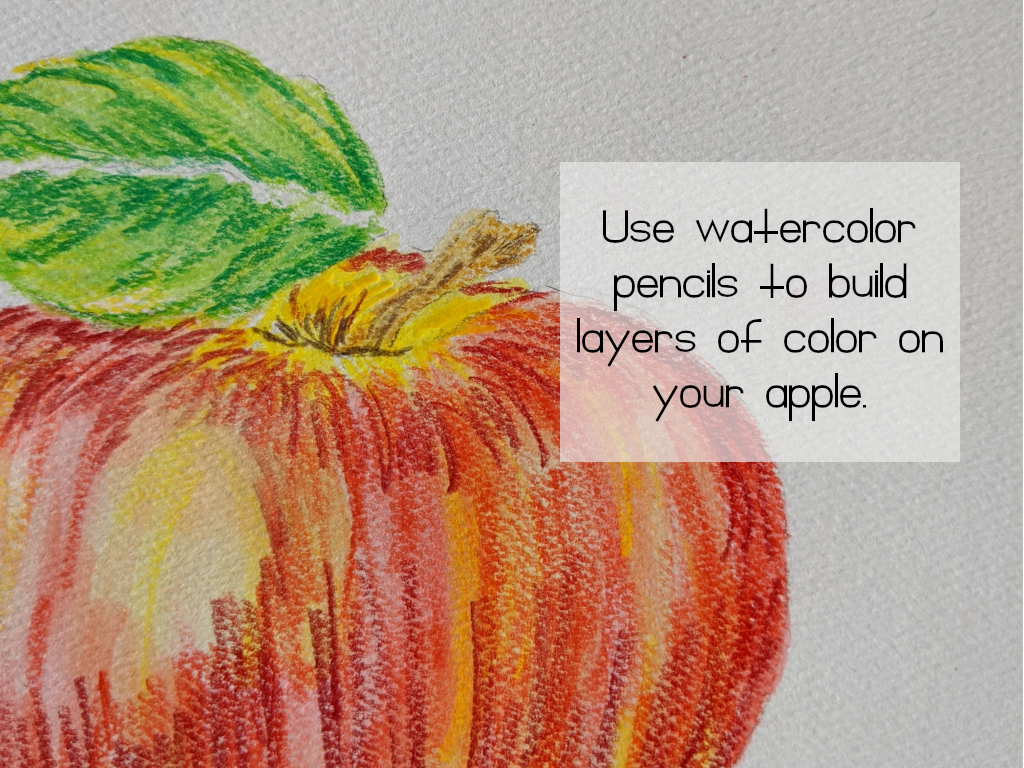
Adding details to any watercolor painting is simply fun.
I add deeper colors this time; rusts, browns and add a bit of darkness to the yellows.
I’m also careful not to disturb my light or white highlights. Reflected light is very important.
My deeper watercolor pencils are used to enhance shaded areas – like the base of the apple.
I’m always thinking about the apple’s overall shape.
It’s important not to overdue at this point. Instead, I can (and probably will) come back over the second layer – and add third and fourth layers as needed.
{Want to try something new? Come see my post on how to paint clouds in watercolor. One of my examples uses watercolor pencils.}
Keep Working Those Watercolor Layers
Each time I use the brush to add water, I get a more detailed and richer apple drawing.
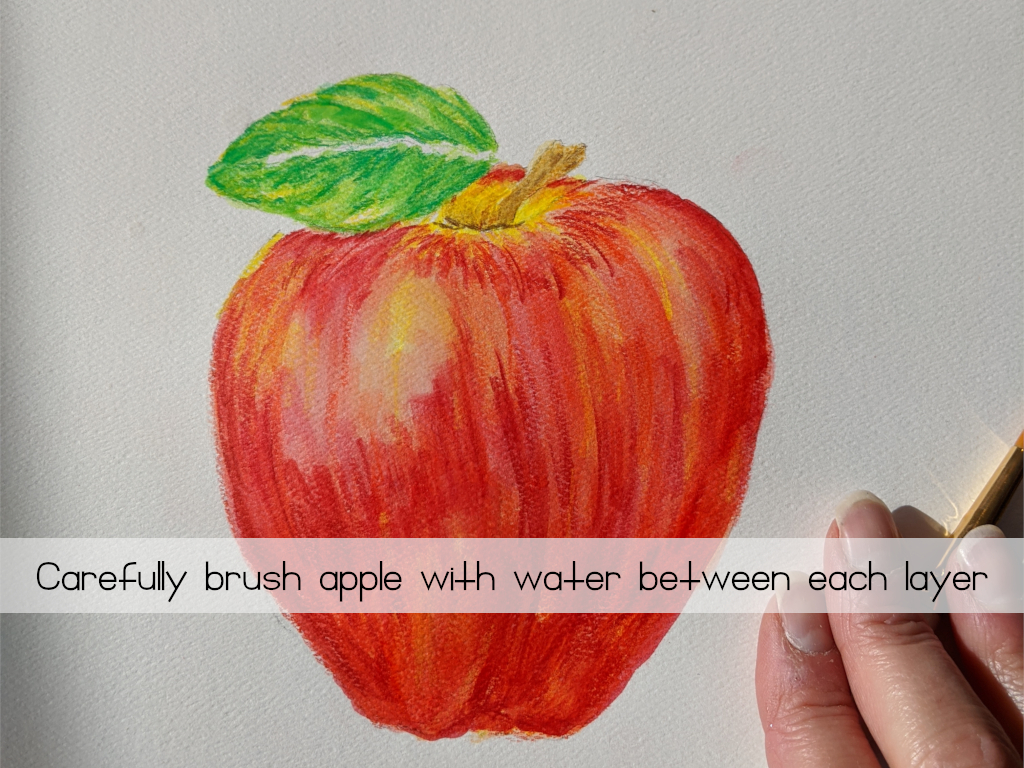
The colors start to pop!
Final Step for This Apple Painting
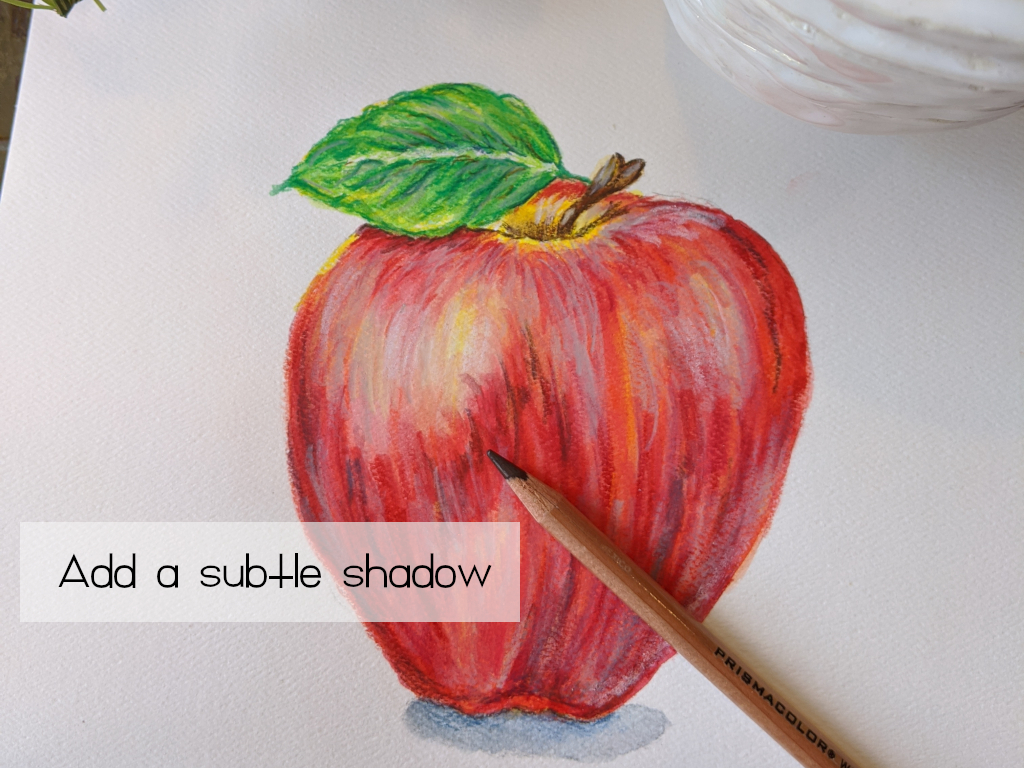
I now do all the finish work, such as adding shadows to the side of the apple, dabbing up extra water to produce highlights, adding more shape to the top of the apple, and carefully coloring in the apple stem.
Sometimes I will add a few colored pencil marks that won’t get brushed out with water (makes for nice texture effects).
If you want to anchor your apple painting, add the apple’s shadow.
A cast shadow is not hard and will cause your painting to pop.
I repeat anything within this process until I’m satisfied.
Make this blog post on how to paint a watercolor apple work for you. Don’t be afraid to play around with the steps.
The skill level for painting an apple can range from beginner to advanced. I love all the watercolor painting techniques that get practiced in bringing a simple apple to life.
Sometimes when I want to check out my current skill level, I will paint an apple as quickly as I can. That will tell me where I’ve improved and where my gaps are.
It’s also a great item to use to practice drawing skills; you will learn so much giving this a try.
You can do a lot of fun things with artwork like this. Casual decors from French Country to Cottage Core to Modern Farmhouse would find a happy space for a beautiful watercolor apple.
I’ll bet you have great ideas for using this apple artwork, too.
Did you enjoy learning how to paint a watercolor apple with watercolor pencils? Want to see more of my design process and have more fun? Take a look at my blog post on Easy Watercolor Painting Ideas. It’s designed just for beginners and has over 75 ideas for you to paint along with me.
Or take a look at how to draw an owl with watercolor pencils. I give you my owl sketch for free to print and trace. Easy peasy!
